
Introduction
Etcetera is a Latin phrase that has become common in the English language. It is often used to refer to a list of items or ideas that are not specifically named. The phrase is often abbreviated as "etc." and is commonly used in both spoken and written English. However, many people are unsure of how to pronounce "etcetera" correctly.
The Correct Pronunciation of Etcetera
The correct pronunciation of "etcetera" is "et-set-er-uh". The emphasis is on the second syllable, and the "c" is pronounced as an "s". It is important to note that the final "a" is pronounced as a schwa sound, which is a neutral vowel sound.

Many people mistakenly pronounce "etcetera" as "ex-set-er-uh" or "ek-set-er-uh". However, these pronunciations are incorrect and can make the speaker sound uneducated or inexperienced.
Common Mispronunciations of Etcetera
There are several common mispronunciations of "etcetera" that you should avoid:
- Ex-cetera
- Ek-cetera
- Et-cetera
- Eks-cetera
Using any of these mispronunciations can make it difficult for others to understand what you are saying, and can make you appear less knowledgeable or educated.
How to Practice Pronouncing Etcetera
If you are unsure of how to pronounce "etcetera" correctly, there are several ways to practice:
- Listen to others: Pay attention to how others pronounce "etcetera" in conversation or on television.
- Use online resources: There are many online resources that can help you practice pronouncing "etcetera", such as pronunciation guides and videos.
- Practice with a friend: Ask a friend to listen to you as you practice saying "etcetera" out loud.
Conclusion
Pronouncing "etcetera" correctly is important if you want to be taken seriously in both professional and social settings. Remember to emphasize the second syllable, pronounce the "c" as an "s", and use a schwa sound for the final "a". With practice, you will be able to pronounce "etcetera" confidently and correctly.
Related video of How To Pronounce Etcetera

Italian is a beautiful language that is spoken by millions of people around the world. If you are learning Italian, one of the most important things you need to understand is how to pronounce the letters correctly. In particular, the letter C can be a bit tricky, as it can be pronounced in different ways depending on the context.
What are the different sounds of C in Italian?

In Italian, the letter C can be pronounced in two different ways: hard and soft. The hard C is pronounced like the English K, while the soft C is pronounced like the English CH.
The hard C is used before the vowels A, O, and U, as well as before consonants. For example, in the word "casa" (house), the letter C is pronounced like the English K.
The soft C, on the other hand, is used before the vowels E, I, and Y. For example, in the word "ciao" (hello), the letter C is pronounced like the English CH.
How to pronounce C in different contexts

To understand how to pronounce C in Italian, it's important to look at some examples. Here are a few common Italian words that use the letter C:
- Casa (house) - pronounced like "KAH-sa"
- Ciao (hello) - pronounced like "CHOW"
- Cena (dinner) - pronounced like "CHEH-na"
- Cane (dog) - pronounced like "KAH-neh"
- Città (city) - pronounced like "CHEET-tah"
As you can see, the pronunciation of C changes depending on the vowel that follows it. If the vowel is A, O, or U, the C is pronounced hard. If the vowel is E, I, or Y, the C is pronounced soft.
Tips for pronouncing C in Italian

If you are struggling to pronounce C correctly in Italian, here are a few tips that can help:
- Practice, practice, practice! Pronouncing Italian correctly takes time and effort, so don't be discouraged if you don't get it right away.
- Listen to native Italian speakers and try to imitate their pronunciation.
- Pay attention to the vowel that follows the C to determine whether it should be pronounced hard or soft.
- Use online resources, such as pronunciation guides and videos, to help you improve your Italian.
Conclusion
Pronouncing C correctly in Italian is essential if you want to speak the language fluently. Remember that the C can be pronounced hard or soft, depending on the context, and pay attention to the vowel that follows it. With practice and perseverance, you can master the pronunciation of Italian and enjoy all the beauty that this language has to offer.
Related video of How to Pronounce C in Italian

ß, also known as the "Eszett" or "Sharp S," is a letter unique to the German alphabet. It may seem like a simple letter, but it can be confusing for non-native German speakers. In this article, we will guide you through the correct pronunciation of ß in relaxed English language.
What is the ß?
The ß is a letter that represents a specific sound in German. It is a ligature of the letters s and z, and it is only used in German. The letter represents a sound similar to the English "ss" or "s" sound, but it is not interchangeable with these sounds.

How to pronounce the ß sound
The ß sound can be difficult for non-native German speakers to pronounce, but with a little practice, it can be mastered. The sound is similar to the English "ss" or "s" sound, but with a slightly longer duration.
Here's how to pronounce the ß sound:
- Start by placing your tongue behind your upper teeth.
- Force air through your mouth, causing your tongue to vibrate against your teeth.
- Hold the sound for a slightly longer duration than you would with the English "ss" or "s" sound.

Examples of words with the ß sound
The ß sound is used in many German words. Here are a few examples:
- Straße (street)
- Maß (measure)
- Spaß (fun)
- Fluss (river)

Words that don't use the ß sound
Not all German words use the ß sound. Some words use the "ss" or "s" sound instead. Here are a few examples:
- Pass (passport)
- Boss (boss)
- Sonnenbrille (sunglasses)

How to type the ß on a keyboard
Typing the ß on a keyboard can be tricky, especially if your keyboard doesn't have a dedicated key for it. Here's how to type the ß:
- On a German keyboard, the ß key is located to the right of the "0" key.
- On an English keyboard, you can type the ß by holding down the "Alt" key and typing "225" on the number pad.
- On a Mac, you can type the ß by holding down the "Option" key and typing "s".

Common mistakes when pronouncing the ß sound
There are a few common mistakes that non-native German speakers make when trying to pronounce the ß sound. Here are a few of them:
- Pronouncing it like a regular "s" sound.
- Pronouncing it like a "z" sound.
- Not holding the sound for long enough.
Practice makes perfect
Pronouncing the ß sound correctly takes practice, but with time and effort, you can master it. Try practicing with words that use the ß sound, and listen to native German speakers to get a better understanding of how the sound should be pronounced.
Conclusion
The ß sound may seem difficult at first, but with practice and patience, you can learn to pronounce it correctly. Remember to place your tongue behind your upper teeth, force air through your mouth, and hold the sound for a slightly longer duration than you would with the English "ss" or "s" sound. With these tips in mind, you'll be speaking German like a pro in no time!
Related video of How To Pronounce ß
Standing for long hours can be very tiring and can lead to sore feet. This is especially true for people who work in jobs that require them to stand for long periods of time, such as retail workers, nurses, and teachers. If you are one of these people, you might be looking for ways to prevent sore feet and make your workday more comfortable. In this article, we will discuss some tips that can help you prevent sore feet from standing all day.
Choose the right shoes

Choosing the right shoes is important if you want to prevent sore feet. Look for shoes that provide good support and cushioning. Shoes with a low heel and a wide toe box are also good options. Avoid wearing high heels, as they can put too much pressure on your feet and cause pain.
Wear comfortable socks

Wearing comfortable socks can also help prevent sore feet. Look for socks that are made of breathable materials, such as cotton or wool. Avoid wearing tight socks, as they can restrict blood flow and cause discomfort.
Take breaks

Taking breaks throughout the day can help prevent sore feet. Try to sit down and rest your feet for a few minutes every hour or so. You can also try stretching your feet and legs during your breaks to improve circulation.
Use orthotic inserts

Orthotic inserts can provide additional support and cushioning for your feet. You can buy these inserts at most drugstores or online. Be sure to choose inserts that are designed for your specific foot type and the activities you will be doing.
Stretch your feet and legs

Stretching your feet and legs can also help prevent soreness. Try to stretch your calves, ankles, and toes throughout the day. You can also try rolling a tennis ball or a frozen water bottle under your feet to massage them and improve circulation.
Stay hydrated

Staying hydrated is important for overall health, but it can also help prevent sore feet. Make sure you drink plenty of water throughout the day to keep your body hydrated and improve circulation.
Adjust your posture

Adjusting your posture can also help prevent sore feet. Make sure you stand up straight and distribute your weight evenly on both feet. Avoid leaning to one side or putting more weight on one foot than the other.
Get a foot massage

A foot massage can help relieve tension and soreness in your feet. You can try massaging your own feet or ask a friend or family member for help. You can also get a professional foot massage at a spa or massage clinic.
Use a foot bath

A foot bath can also help relieve soreness in your feet. You can use a bucket or basin filled with warm water and Epsom salt to soak your feet for 15-20 minutes. This can help reduce inflammation and improve circulation.
Wear compression socks

Compression socks can help improve circulation and reduce swelling in your feet. You can buy compression socks at most drugstores or online. Be sure to choose socks that fit well and provide the right amount of compression.
Conclusion
Standing all day can be tough on your feet, but there are things you can do to prevent soreness and make your workday more comfortable. Be sure to choose the right shoes, take breaks, stretch your feet and legs, and stay hydrated. You can also try using orthotic inserts, getting a foot massage, or soaking your feet in a foot bath. With these tips, you can keep your feet feeling great even after a long day of standing.
Related video of How To Prevent Sore Feet From Standing All Day

Introduction
Tea is one of the most popular beverages in the world, and it is enjoyed by millions of people every day. Whether you are a tea lover or just starting to explore the world of tea, learning how to prepare a perfect cup of tea is an essential skill that everyone should have. In this article, we will guide you through the steps to prepare a cup of tea that is just right for you.
Choose Your Tea

The first step to prepare a cup of tea is to choose the type of tea you want to drink. There are various types of tea available, such as black tea, green tea, white tea, oolong tea, and herbal tea. Each type of tea has its unique flavor and aroma, so choose the one that suits your taste buds.
Boil Water

The next step is to boil water. You can use a kettle or a pot to boil water on the stove. Make sure to use fresh water and not the one that has been sitting in the kettle or pot for a long time. Boil the water until it reaches the temperature recommended for the type of tea you are using.
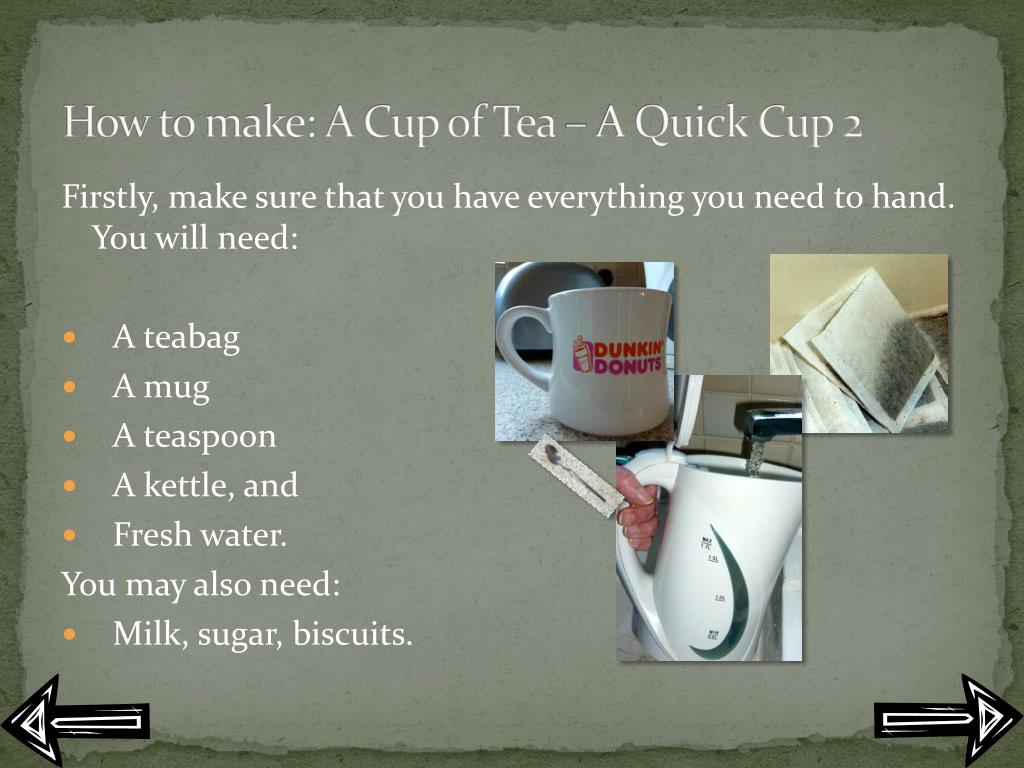
Prepare The Tea Bag Or Loose Leaves

If you are using a tea bag, place it in a cup. If you are using loose leaves, use a strainer to hold the leaves and place it in a cup. The general rule is to use one tea bag or one teaspoon of loose leaves per cup of water.
Pour Water Over The Tea
Now, pour the hot water over the tea bag or loose leaves in the cup. Make sure to pour the water slowly and evenly to extract the best flavor from the tea. Leave the tea to steep for a few minutes, depending on the type of tea you are using.
Add Milk (Optional)

If you prefer your tea with milk, you can add it at this point. However, this step is optional and depends on the type of tea you are using. For example, black tea is often served with milk, while green tea is not.
Add Sugar (Optional)

If you like your tea sweet, you can add some sugar or honey to it. Again, this step is optional and depends on your personal preference.
Stir The Tea

Stir the tea gently to mix all the ingredients well. Be careful not to spill the hot liquid while stirring.
Remove The Tea Bag Or Strainer

If you used a tea bag or strainer to hold the loose leaves, remove it from the cup at this point. You can discard the tea bag or leaves or reuse them for another cup of tea.
Enjoy Your Tea

Your cup of tea is now ready to enjoy. You can sip it slowly and savor the taste and aroma of the tea. You can also add some lemon or mint to enhance the flavor of the tea.
Clean The Tea Set

After you finish your tea, make sure to clean the tea set. Rinse the cup and saucer with warm water and dry them with a clean towel. Wash the teapot or kettle with soap and water, and dry it thoroughly before using it again.
Tips For Making Perfect Tea

To make a perfect cup of tea, follow these tips:
- Use fresh water for every cup of tea.
- Boil the water to the recommended temperature for the type of tea you are using.
- Steep the tea for the recommended time to extract the best flavor.
- Use high-quality tea bags or loose leaves for better taste.
- Store your tea in an airtight container away from light and moisture.
Conclusion
Preparing a cup of tea is a simple but enjoyable process that can be done in a few minutes. By following the steps outlined in this article, you can make a perfect cup of tea that suits your taste and preferences. So, go ahead and make yourself a cup of tea and enjoy its soothing and refreshing effects.
Related video of How To Prepare A Cup Of Tea

Introduction
Playing guitar is one of the most enjoyable hobbies that a person can have. It's a great way to relax and unwind, and it can even be turned into a career. If you're a fan of blues music, then you're probably familiar with the song "Nasty Letter" by Otis Taylor. It's a great song with a unique sound, and in this article, we'll be showing you how to play it on the guitar.
Guitar Tuning

Before you start playing "Nasty Letter" on the guitar, you'll need to make sure that your guitar is tuned correctly. The song is played in standard tuning, which means that the strings should be tuned to E, A, D, G, B, and E.
Chords Used

The chords used in "Nasty Letter" are E, A, and B7. These are all basic chords that most guitar players should be familiar with. If you're not familiar with these chords, you can find tutorials online that will show you how to play them.
Strumming Pattern

The strumming pattern used in "Nasty Letter" is fairly simple. It's a basic down-up strumming pattern that should be easy to pick up. You can also add some variations to the strumming pattern to make it more interesting.
Verse

The verse of "Nasty Letter" is played using the chords E, A, and B7. The strumming pattern used in the verse is a simple down-up strumming pattern. You should play each chord for two measures.
Chorus

The chorus of "Nasty Letter" is played using the chords E and A. The strumming pattern used in the chorus is the same as the one used in the verse. You should play each chord for two measures.
Bridge

The bridge of "Nasty Letter" is played using the chords E, A, and B7. The strumming pattern used in the bridge is a bit more complex than the one used in the verse and chorus. You should play each chord for four measures.
Solo

The solo in "Nasty Letter" is played using the E minor pentatonic scale. If you're not familiar with this scale, you can find tutorials online that will show you how to play it. The solo is played over the verse and chorus chords.
Conclusion
Playing "Nasty Letter" on the guitar is a lot of fun, and it's a great way to improve your guitar skills. With a bit of practice, you should be able to play the song with ease. Remember to take your time and practice each section of the song until you feel comfortable with it.